
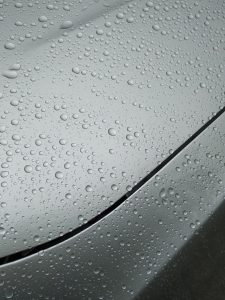
How to Prepare a Surface Before Installing Custom Decals
Even a professionally produced decal can fail early if the surface underneath is dirty, oily, damaged, or unsuitable for adhesion.
Proper preparation gives the adhesive consistent contact with the surface. It also reduces the risk of bubbles, lifted edges, trapped debris, and premature peeling. Before installing a custom decal, clean the application area thoroughly, confirm that it is dry, and inspect it for conditions that could interfere with adhesion.
Why Surface Preparation Matters
Decal adhesive needs direct contact with a stable surface. Dust, wax, grease, silicone, moisture, and loose paint create barriers between the adhesive and the material underneath.
Poor preparation can lead to:
- Edges lifting shortly after installation
- Dirt or particles showing beneath the graphic
- Air pockets and uneven adhesion
- Decals shifting during application
- Reduced service life
Surface preparation is especially important for vehicle graphics, RV decals, equipment labels, fleet numbers, and outdoor identification decals.
Inspect the Surface Before Cleaning
Cleaning should not be the first and only step. Start by evaluating the condition of the application area.
Look for:
✅ Peeling or flaking paint
✅ Rust or corrosion
✅ Cracks in fiberglass or coatings
✅ Existing adhesive residue
✅ Oxidation or chalky paint
✅ Deep scratches or surface damage
A decal may stick poorly to a coating that is already failing. Applying new vinyl over loose paint can also cause the paint to lift if the decal is repositioned or removed later.
Remove Old Decals and Adhesive Residue
New decals should generally not be installed directly over deteriorated vinyl, cracked graphics, or uneven adhesive residue.
Old material can create visible ridges and weak points beneath the new decal. It may also continue peeling, taking the new graphic with it.
After removing an old decal:
- Remove as much adhesive as possible.
- Use a surface-compatible adhesive remover when necessary.
- Clean away any residue left by the remover.
- Allow the area to dry completely.
- Inspect the surface again before installation.
Avoid aggressive scraping tools that could scratch paint, gelcoat, glass, or plastic.
Wash Away Dirt and Road Contamination
For vehicles, RVs, trailers, and equipment, begin with a normal wash to remove surface dirt.
Use a mild cleaner that does not leave behind wax, polish, or protective residue. Pay particular attention to:
- Lower panels
- Wheel-adjacent areas
- Door edges
- Recesses
- Rivets and seams
- Surfaces exposed to oil or road grime
Heavy contamination may require more than one cleaning step.
Remove Wax, Grease, and Silicone
A surface can look clean while still containing substances that interfere with adhesion.
Wax, tire dressing, detailing products, silicone-based cleaners, oil, and grease may remain after a standard wash. These residues can cause decals to release around the edges or fail to bond evenly.
Use a cleaner appropriate for the surface and the decal material. The final cleaning step should leave the application area free of residue rather than adding shine or protection.
Let the Surface Dry Completely
Moisture can become trapped beneath a decal, particularly around body seams, trim, rivets, handles, and panel edges.
After washing, allow enough time for the surface and surrounding gaps to dry. Water that later drains from a seam can contaminate the adhesive during installation.
Compressed air or clean, lint-free towels may help dry detailed areas, but care should be taken not to spread dirt back onto the cleaned surface.
Pay Attention to Temperature
Extreme temperatures can affect both the decal and its adhesive.
A surface that is too cold may prevent the adhesive from bonding properly. A very hot surface can make vinyl difficult to position and may cause it to stretch unexpectedly.
For outdoor installations:
✅ Avoid installing immediately after rain
✅ Keep the surface out of direct intense sunlight when possible
✅ Do not apply vinyl to a visibly damp or dew-covered surface
✅ Follow the material manufacturer’s recommended temperature range
The surface temperature matters more than the surrounding air temperature alone.
Avoid These Common Preparation Mistakes
Several cleaning habits can create problems even when the installer is trying to prepare the surface carefully.
Using wax-containing car wash products
These products may leave a protective layer that reduces adhesion.
Cleaning with a dirty towel
A reused cloth can transfer grease, wax, or detailing chemicals back onto the surface.
Applying decals over oxidation
Chalky or heavily oxidized paint may not provide a stable bonding surface.
Touching the cleaned area
Hands can transfer oils onto the application surface. Avoid unnecessary contact after the final cleaning step.
Installing immediately after painting
Fresh paint and coatings may need time to cure before decals can be safely applied. Follow the paint or coating manufacturer’s guidance.
Some Surfaces Require Extra Evaluation
Not every material accepts vinyl in the same way.
Potentially challenging surfaces include:
- Textured plastic
- Low-surface-energy plastics
- Unsealed wood
- Rough masonry
- Rubber
- Powder-coated equipment
- Heavily oxidized fiberglass
- Recently painted panels
A small adhesion test may be appropriate when the material or coating is uncertain.
When Professional Decal Installation Makes Sense
Simple labels on smooth, accessible surfaces may be suitable for careful self-installation. Larger or more complex graphics often benefit from professional application.
Professional installation may be appropriate for:
✅ Large RV graphics
✅ Vehicle door branding
✅ Long stripes or lettering
✅ Curved or recessed panels
✅ Riveted equipment surfaces
✅ Graphics that must align across multiple panels
A trained installer can evaluate the surface, position the graphic correctly, and work around complex shapes without unnecessary stretching or distortion.
Frequently Asked Questions
Can I install a decal immediately after washing a vehicle?
Only after the surface and nearby seams are fully dry. Remaining moisture can interfere with adhesion or drain onto the application area during installation.
Can I clean the surface with household glass cleaner?
Some glass cleaners contain additives that may leave residue. Use a cleaner that is appropriate for the surface and compatible with the decal manufacturer’s recommendations.
Will a decal stick over wax?
It may appear to stick initially, but wax can weaken the bond and contribute to lifting. The wax should be removed from the installation area first.
Can new decals be placed over old decals?
It is usually better to remove old or deteriorated graphics first. Installing over existing material can create uneven surfaces and reduce the reliability of the new application.
What should I do if the paint is peeling?
Do not install the decal until the unstable paint or coating has been addressed. Vinyl cannot create a durable bond when the underlying surface is already failing.