
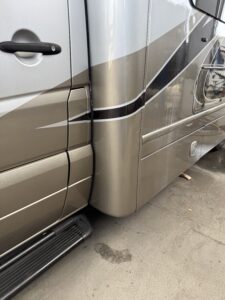
Can You Pressure Wash an RV with Vinyl Decals?
Pressure washing an RV with vinyl decals requires caution. High-pressure water directed too closely at decal edges can contribute to lifting or damage, particularly when the graphics are already aged, cracked, or beginning to peel.
That doesn’t mean every RV with vinyl graphics must be washed entirely by hand. It means the condition of the graphics, cleaning method, water pressure, distance, and direction of the spray all matter.
For RV owners trying to preserve factory graphics, replacement decals, or custom vinyl, gentler cleaning is usually the safer approach.
Why Pressure Washing Can Be Hard on RV Decals
A vinyl decal depends on continuous adhesion between the graphic and the RV surface.
Once an edge begins to lift, concentrated water pressure can reach underneath it. Instead of simply cleaning the surface, the spray may place additional force against the adhesive bond.
Potential problems include:
✅ Lifted decal edges
✅ Existing cracks becoming more noticeable
✅ Small damaged areas separating further
✅ Water and contamination reaching beneath loose vinyl
✅ Accelerated failure of already deteriorated graphics
Newer graphics in good condition generally present a different situation from vinyl that has spent years outdoors.
The Biggest Mistake: Spraying Directly Into Decal Edges
The direction of the water matters.
Imagine a decal with an edge that has started lifting slightly. Spraying directly toward that edge can force water underneath it.
A safer approach is to avoid concentrating pressure along graphic edges altogether.
Particular attention should be given to:
- Points and narrow ends of graphics
- Existing lifted areas
- Seams between multiple vinyl pieces
- Lettering with numerous individual edges
- Cracked graphics
- Areas where previous damage is already visible
If a decal is clearly failing, aggressive washing is unlikely to improve the situation.
Inspect Your RV Graphics Before Washing
Before cleaning the RV, take a few minutes to examine the decals closely.
Look for:
Curling Edges
Run a visual inspection around the perimeter of larger graphics. Small lifted sections can be easy to miss from a distance.
Fine Cracks
Cracking indicates that the vinyl has begun deteriorating. Heavily cracked material should be treated gently because it may already be brittle.
Missing Sections
If small pieces have already separated, nearby material may also be deteriorating.
Bubbling or Separation
Bubbles and loose areas deserve additional caution during washing.
Finding these conditions beforehand allows you to clean around vulnerable graphics rather than discovering the problem after more vinyl has lifted.
A Garden Hose and Gentle Washing May Be Enough
Routine RV cleaning doesn’t necessarily require concentrated pressure.
For many exterior surfaces, a normal rinse combined with an appropriate RV or automotive cleaning product and non-abrasive washing tools may provide the cleaning needed without directing powerful water against graphic edges.
A basic approach is:
- Rinse loose dirt from the surface.
- Wash using a suitable mild cleaning product.
- Avoid aggressive scrubbing over damaged graphics.
- Rinse thoroughly.
- Dry using methods that won’t catch lifted decal edges.
Always consider the RV manufacturer’s care instructions and any guidance supplied for the specific graphic or protective-film material.
Be Careful With Brushes and Scrubbing Too
Water pressure isn’t the only concern.
An aggressive brush can catch a peeling corner or repeatedly abrade an aging graphic.
Avoid using abrasive pads or harsh scrubbing methods on vinyl graphics. Extra force will not reverse fading, cracking, or deterioration that is occurring within the material itself.
If discoloration remains after normal cleaning, determine whether you are seeing contamination or permanent material aging before attempting increasingly aggressive cleaning.
What About Automatic Truck or RV Washes?
The cleaning process used by an automatic or commercial wash can vary considerably.
Before using one, consider:
- Whether brushes contact the RV
- How close high-pressure equipment operates
- The condition of your existing decals
- Whether your RV manufacturer has specific washing restrictions
- Whether protective film is also installed
An RV with heavily peeling graphics may require more caution than one with intact exterior surfaces.
Can Pressure Washing Remove Old RV Decals?
A pressure washer should not be treated as a general-purpose method for stripping deteriorated RV graphics.
Old vinyl can break into small pieces, and aggressive pressure can affect more than the decal itself. The condition and type of the underlying exterior finish also need to be considered.
Professional decal removal typically involves evaluating the graphic, adhesive, and underlying surface and selecting an appropriate removal method rather than simply increasing water pressure.
Washing an RV Before New Decals Are Installed
Cleaning becomes particularly important before a replacement graphics project.
The application area needs to be free from substances that can interfere with adhesion, including:
✅ Dirt
✅ Road grime
✅ Wax
✅ Oil
✅ Silicone-containing residues
✅ Old adhesive
A normal wash may be the beginning of preparation, but it is not necessarily the final preparation step before vinyl installation.
The surface should also be completely dry and suitable for adhesion.
Washing Newly Installed RV Decals
Newly applied vinyl needs appropriate time to establish adhesion, and requirements can vary by material and installation conditions.
Follow the installer or material manufacturer’s care instructions before washing the RV.
Once normal washing resumes, protecting the edges remains sensible. Avoid treating a newly installed graphic as though it were simply part of the painted surface.
Older Graphics Need More Care
A washing method that causes no obvious issue on relatively new vinyl may be too aggressive for older graphics.
Signs that extra caution is appropriate include:
- Widespread fine cracking
- Brittle-looking vinyl
- Multiple lifting edges
- Significant fading
- Shrinkage around the graphic perimeter
At this stage, the better question may not be how to clean the decal more aggressively, but whether replacement should be planned before deterioration becomes more extensive.
When Cleaning Won’t Fix the Appearance
Some RV owners continue trying stronger cleaners because their graphics look faded, cloudy, cracked, or discolored.
Cleaning can remove material sitting on the vinyl. It cannot restore vinyl that has physically deteriorated.
If the graphic itself is:
✅ Deeply cracked
✅ Shrinking
✅ Peeling extensively
✅ Missing sections
✅ Permanently faded
replacement may be more practical than increasingly aggressive cleaning.
Frequently Asked Questions
Is it safe to pressure wash RV decals?
It depends on the condition of the graphics and the cleaning method. Concentrated high-pressure water, especially when directed at decal edges, can contribute to lifting and damage. Gentler washing is the safer choice when graphics are aging or already deteriorated.
Can I pressure wash around peeling RV graphics?
A peeling graphic is already compromised. Avoid directing concentrated water at or underneath lifted areas because it may worsen the separation.
Why did my RV decal peel after washing?
The graphic may already have had weakened adhesion, aging vinyl, or a lifted edge. Water pressure can aggravate an existing weakness rather than being the only cause of the failure.
Can faded RV decals be restored by cleaning them?
Cleaning can remove dirt and surface contamination, but it cannot reverse permanent fading or physical deterioration of the vinyl.
Should I wash my RV before replacing the graphics?
Yes, cleaning is an important part of preparation, but the surface may require additional work to remove wax, adhesive residue, contamination, or other substances before new vinyl is installed.
What should I do if several decals are already cracking and peeling?
Inspect the entire graphic package before investing significant effort in cosmetic cleaning. If deterioration is widespread, planning removal and replacement may provide a better long-term solution than repeatedly trying to preserve failing vinyl.